

What to do after installing WordPress? is the first question that commonly asked by the every blogger when they start their blogging journey. If you’re new to WordPress then this post especially for you.
Whether you’ve installed WordPress manually or installed by your hosting provider. Installing WordPress is not the end, It’s just a start. Before start learning, what to do after installing WordPress? Let we look at,
What is WordPress?
According to Wikipedia
WordPress is a free and open-source content management system (CMS) based on PHP and MySQL. WordPress is installed on a web server that is either part of an Internet hosting service or a network host in its own right.
In simple language, Wordpress is a software where you can write your content, like a Microsoft world. But you need a server where you can save your data, like a hard disk of a computer.
Why Do You Need To Do WordPress Setting?
Let’s say you’re creating a website for your client. The website is ready to writing a New Content and to be published it.
Now, What are the things that must be done and checked to make sure your client WordPress website is secure, optimized and all the little details are adjusted?
So that they do not face any problem in future.
You can’t leave your WordPress setting as it is. But, It is a necessary and Good thing to change these settings to improve the performance and security factor on your website.
In this post, You will learn what to do after installing WordPress so that you never facing any problem or error in your website.
I will also side by side cover its importance and necessity. And at then end of the article, one video tutorial to do these setting.
What To Do After Installing WordPress
Here’s a checklist of things you should do on every fresh WordPress install. And Clear Cut answer of your Question, what to do after installing WordPress?
- Delete Dummy Post, Page and Comment.
- Delete Unused theme and Plugin
- Set Up your Site Title and Tag Line
- WordPress and Site Address URL
- User and Author Registration
- Set your Time Zone and Date
- Writing and Reading Setting
- Choose Your Discussion Setting
- Set-up Your Profile/Gravatar
- Change Your Permalink Structure
- Change Default Widgets On Sidebar
Delete Dummy Post, Page and Comment
When you install WordPress, You get some post, page, and comment by default to check how your post, page, and comment look.
If you do not install a new theme on your site, then this is the look of your dummy post on Twenty Sixteen theme.
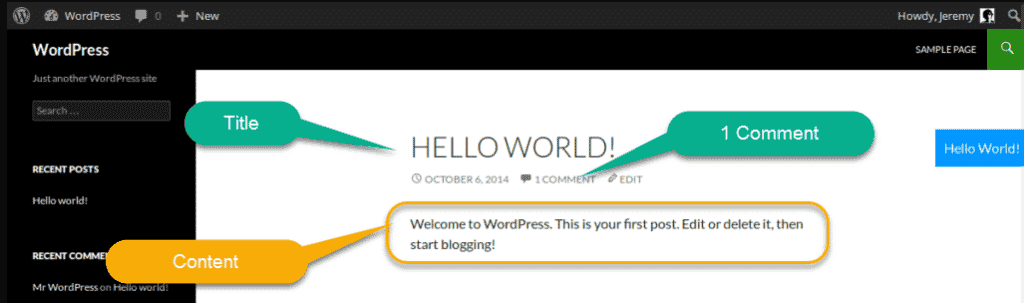
You have to delete this post.
You don’t need to delete the comment. When you delete the post, your comment automatically deletes with a post.
- Login your WordPress and an Admin.
- Click on a Post and then All Post. And hit the Trash Button.
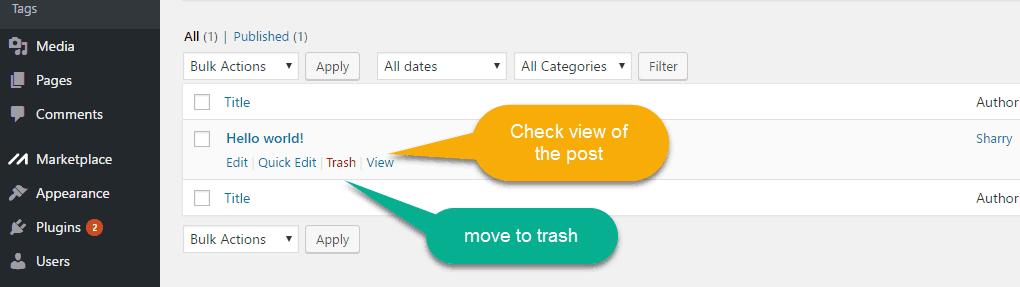
You can also check your Post Preview by clicking on View Tab.
Note: – When you delete your post it will move to Trash box. You can undo your post from Trash also but we don’t need this post. So also delete this post from the trash box.
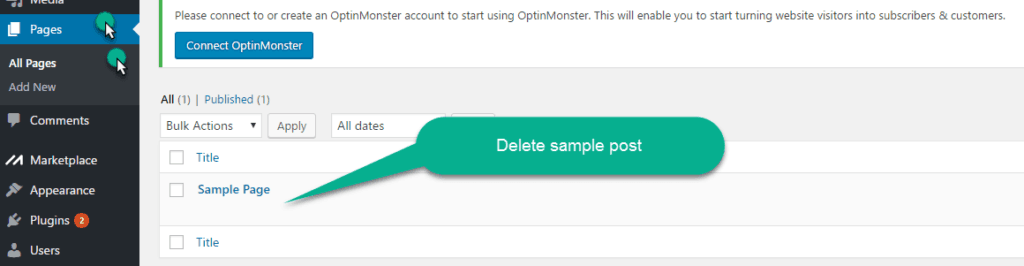
Simarllay, Do the same thing with Sample Page and delete it.
- Click on Page and then All Page and move your Sample page into Trash.
Delete Unused theme and Plugin
Most WordPress users will install and test a few themes before deciding on one that’s a keeper.
Instead of leaving those unused themes installed, be sure to delete them.
Leaving them there can create the unnecessary file and increase the load on your site and slow down it.
- Click on the Appearance and then theme.
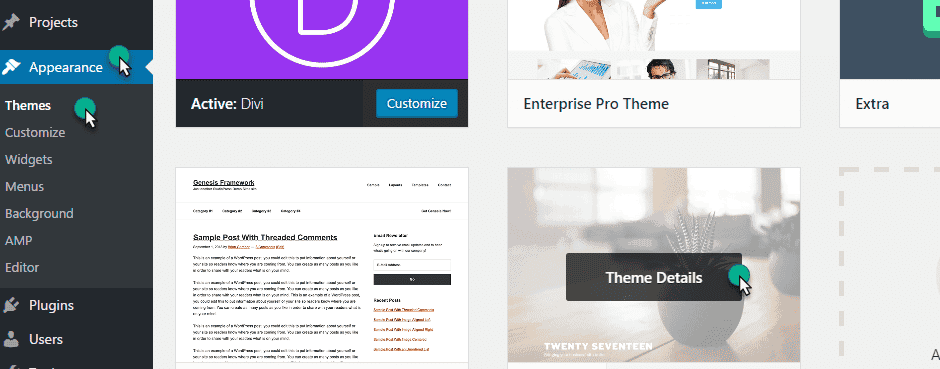
When you open this theme. You will get a delete button on the right bottom of the page.
- Click on a delete button and hit the Ok button.

WordPress also comes with some already installed plugins. Some of them are,
- Akismet
- Hello dolly
- Jetpack
- Mojo marketplace
Akismet is a good plugin to deal with spam comment but you need to “hello dolly plugin” and other. Here is a list of the plugin that every blogger must have.
- Click on Plugin and then installed Plugins.
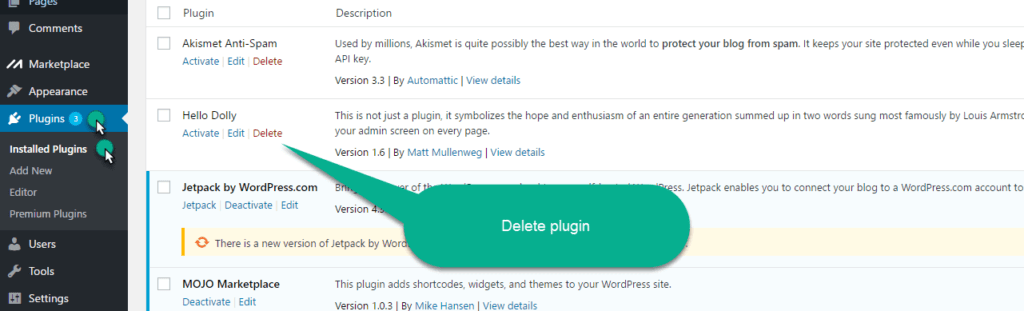
- Now click on Delete, to delete the plugin.
Set Up Your Site Title and Tag Line
Title and Tag Line are two different things.
But both play an important role to increase your brand awareness and Identify your website. And also tell people and search engines what your website is about.
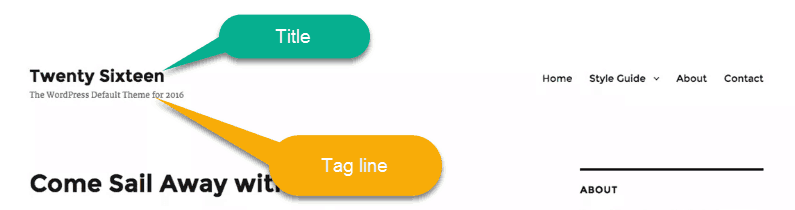
- The Site Title: – Is a name of your website and
- Tagline: – is a one line description of your site.
Maximum time website owner/company use logo in place of Title and Tag Line.
- Click on Setting and then General setting.
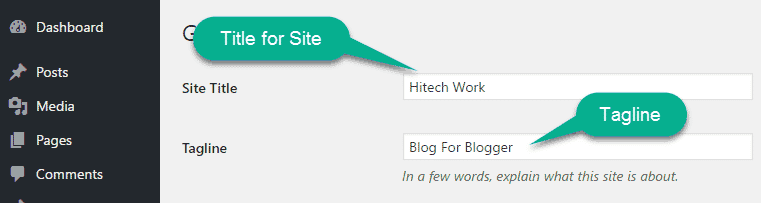
WordPress.org default Tagline is “Just another WordPress site”.Make sure you replace it with your own.
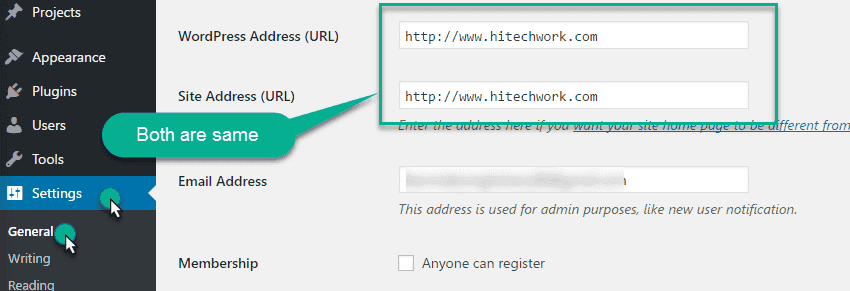
WordPress and Site Address URL
WordPress is the address of your web directory and Site address is for your homepage.
Some Blogger uses different site address and different WordPress address URL. But I recommended use same WordPress and site address URL.
If you change, it creates a lot of Problem in future.
But here you can select www or non-www website, according to your choice. But make sure both the URL are same.
- Click on Setting and then General.
By default WordPress have non-www URL, You no need to make any change. But if you want to make your website www (word wide web site), then just add WWW in the URL and hit save button.
You no need to make any change. But if you want to make your website www (word wide web site), then just add WWW in the URL and hit save button.
Note: – After changing these URL, your website automatically logout. Please make sure you have a password and User name of your site in your hand. By default WordPress login URL is
By default WordPress login URL is
http://Yourdomainname/wp-admin
Now it become
http://www.yourdomainname.com/wp-admin
Tips: – After doing this setting verify your website with google search engine to get indexed by google.
User and Author Registration
If you want to work in a team, hire someone to write a content for you or running a multi-author blog, then tick on a link so that user can register to your site.
But I recommend, if you are new on the web then disable this feature because a hacker is also there for register your site.
If you want to do a guest post then,
- Tick off the “Anyone can register” box, and
- set the “New User Default Role” as “Contributor”.
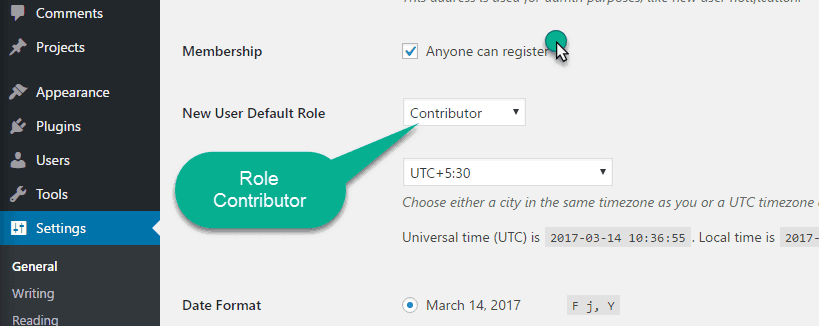
Note: – Before enabling this feature to make sure your WordPress blog are secure. If you don’t want people to register, don’t tick the “Anyone can register” box.
Set Your Time Zone and Date
Time zone is important to check and Rest the report in your WordPress area.

You can schedule your posts, they will go live according to your time Zone.
Note: – Time must be correct, to compare the report on the time base.
Writing and Reading Setting
In writing setting.
You have to select default category, so that, Whenever you publish a post will Automatically go into the Default category.
First, you have to create a category, To learn more read this Beginner guide to category and tags.
- Click on Post and then Category and give a name to a category.
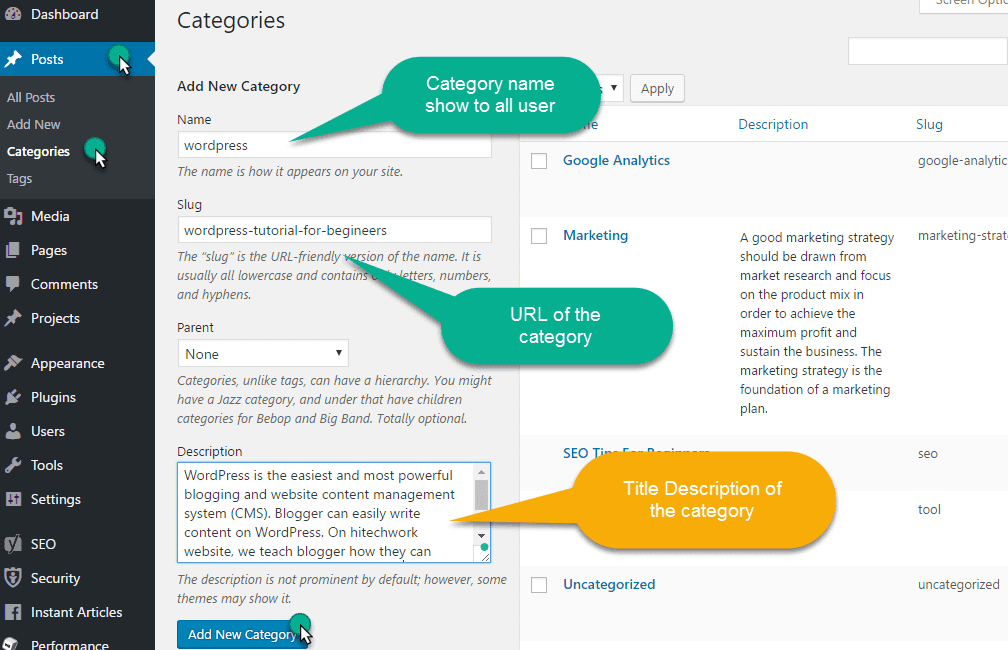
- Add the detail to the category and hit Add New Category Button.
Note: – You can create an unlimited Category. There is no limit on a category. Your category is ready, to make it default category,
- Click on Setting and then writing
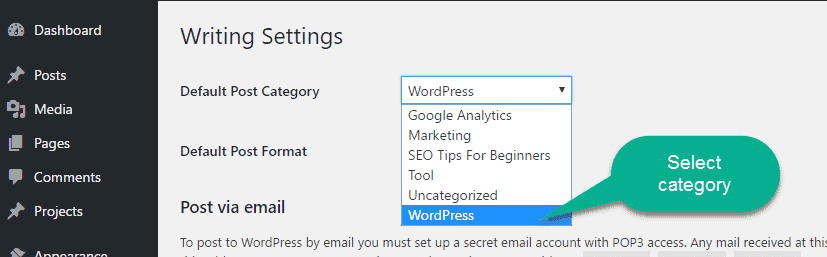
- Select the category and save the change.
In Reading Setting Here you can set what your front page display will be (it’s like a homepage)
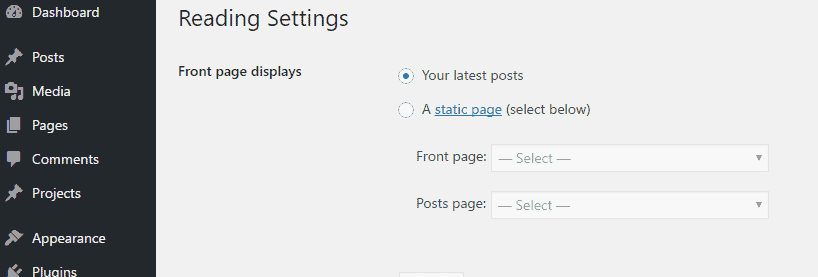
There is a two option
- Your Latest post and
- A Static page
This part is great if you want to have a custom homepage to display your services and have a separate page to display all your blog posts.
If you don’t have a designer Home page for your site, then select the latest post as your home page.
Choose Your Discussion Setting
Here you can control how user comments on your post.
For a beginner, it is difficult to understand all the feature of discussion setting. But here is a little view to understanding what you can control here,
- Automatically close comments on articles older then decided the day.
- Break comment into two page, if you have a large number of comment.
- You get an email when user comment on your website.
- The comment must need to approve manually.
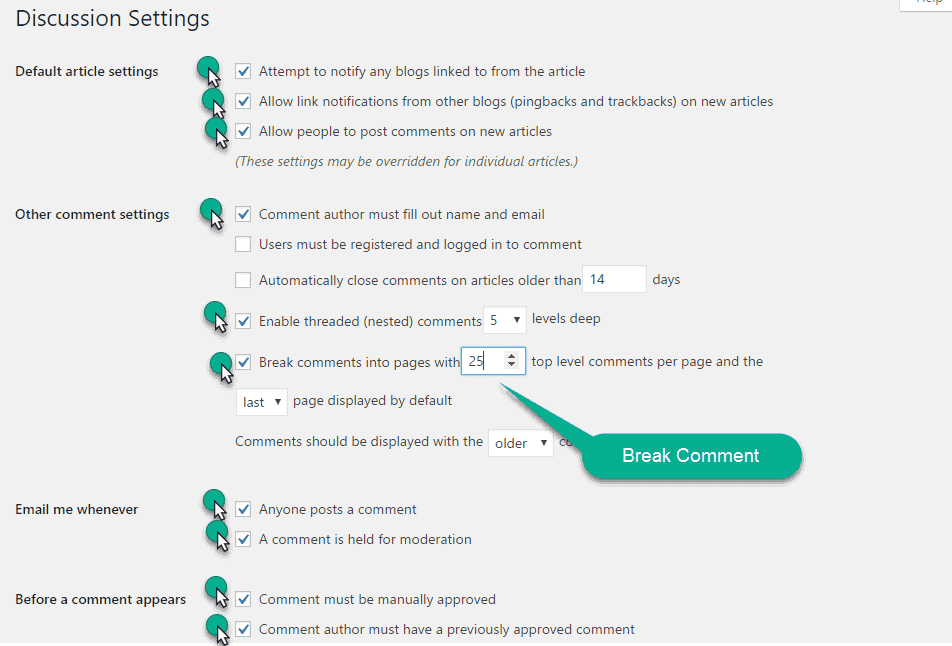
- You’ll find all these options in Discussion under setting.
On this screen, you’ll be also able to control the circumstances under which your site sends you email notifications about comments.
Set-up Your Profile/Gravatar
In this section, you have to write the detail of the author of the blog or website owner.
This detail is important for search engine and its uses by the google to check your online prescience on the web.
WordPress uses a specific type of avatar called Gravatar (Globally Recognized Avatar). Gravatars follow you around the web and automatically appear when you post a comment on a WordPress site or sign up on a WordPress site with your email account.
- Click on User and then click on Your Profile
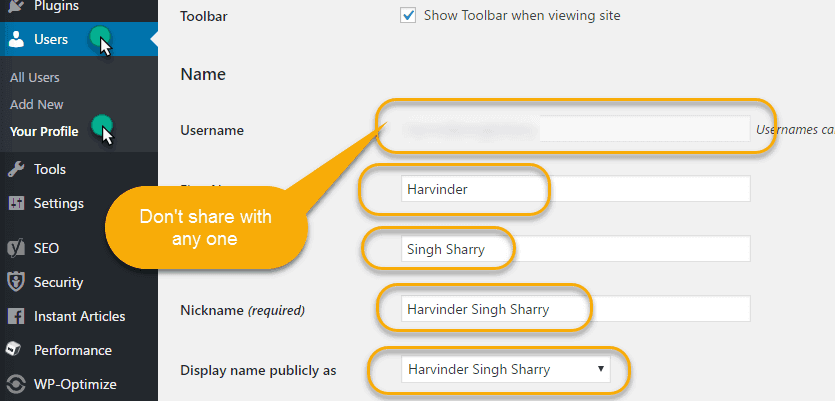
- Now your personal detail here and hit update profile button.
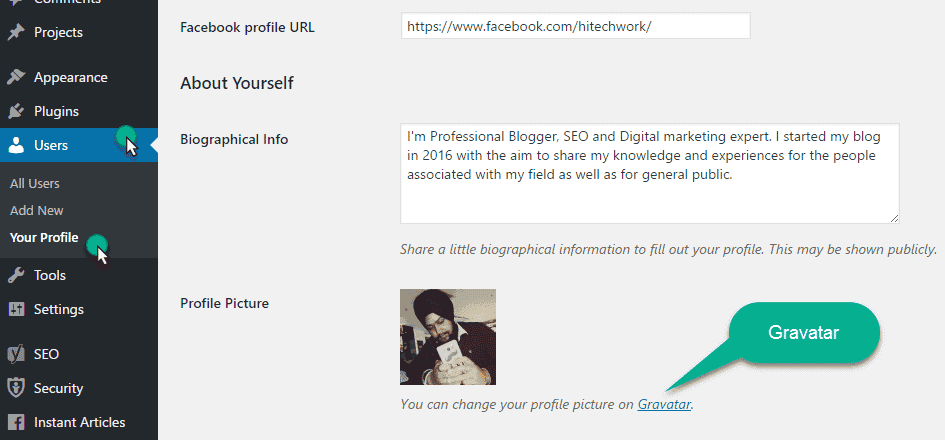
Note: – You can also add your Contact Info and a Biographical Info. Depending on the theme, these may show up in different locations.
Signing up with Gravatar is also an easy way to ensure that your profile photo is displayed alongside all of the posts you publish on your blog.
Change Your Permalink Structure
One of the most important elements in WordPress sites is Permalink structure also called URL structure. According to Code.Wordpress.org
Permalinks are the permanent URLs to your individual pages and blog posts, as well as your category and tag archives. A permalink is the web address used to link to your content. The URL to each post should be permanent, and never change — hence the name permalink
In a simple language,
Permalink is an URL of your post, page, category, tag, and everything on your website.
The user can find your post through this permalink, So your permalink must be neat and clean. Learn more about
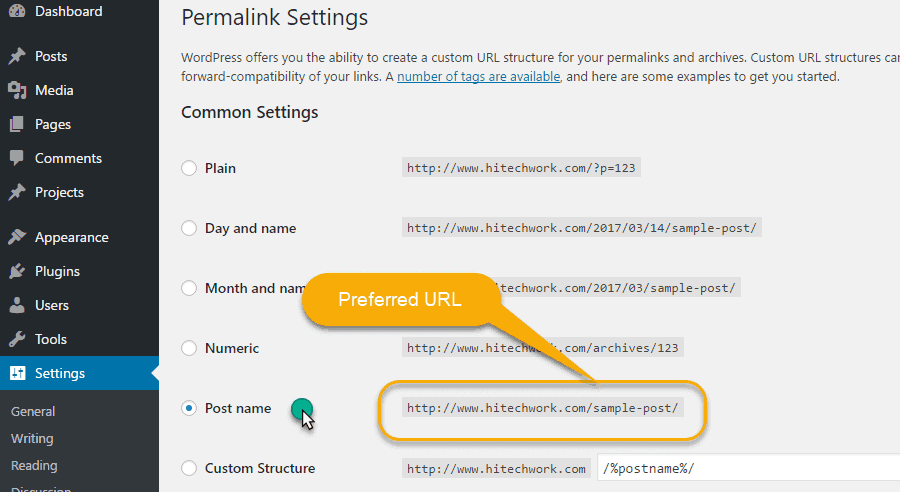
Learn more about SEO friendly URL to make a decision. By default WordPress, permalink looks like a,
http://yourdomain.com/p=123. This permalink is short, but not friendly for search engines. You have to ensures that your permalink when appearing in the search Result, it will contain some keywords. So that you can rank for that
This permalink is short, but not friendly for search engines. You have to ensures that your permalink when appearing in the search Result, it will contain some keywords. So that you can rank for that
You have to ensures that your permalink when appearing in the search Result, it will contain some keywords. So that you can rank for that long tail keyword.
Note: – Google give more importance to the first 67 characters of the URL. See the below screenshot, how google use keyword to find content.

- Go to settings and click on Permalink and Select any one option according to your choice.
Every website is different and has different need. You decide first and then apply the setting.
Warning: – This is a one-time setting. After doing this setting, Your all post, page and category URL are change. That means your every post have new URL address. So all your current Social ranking are Gone.
Note: – I recommend to do this setting if your website not has too much content or your website is new. But if you want, you can still change it for the better future result.
You can also designee Your Custom Permalink Structure Some people choose to add in
Some people choose to add in category in the URL like this
http://example.com/category/title-of-article
To change your permalink structure choose Custom Structure and paste /%postname%/ in the box.
If you want to add the category as well paste in /%category%/%postname%/
Note: – Every custom URL must start with ” /% ” tag and end with ” %/ ” tag.
Change Default Widgets On Sidebar
Most themes usually come with at least one widgets area that is usually the main sidebar displayed on the right or left side, according to your theme.
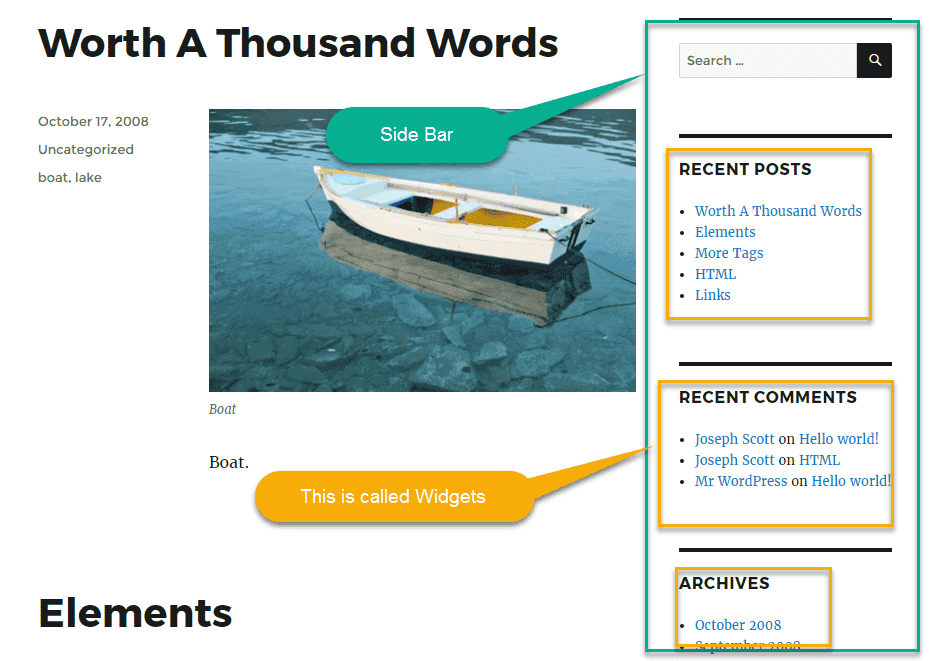
Side Bar is important to show your ads, product, latest news etc.
By default WordPress show recent Post, Archive and category which is not good for a website.
First, delete these widgets and then add here something interesting like, follow us, New product, offer page etc.
- Click on Appearance and then click on Widgets.
- Now click on side Bar and just drag out the slide that you do not want in the sidebar
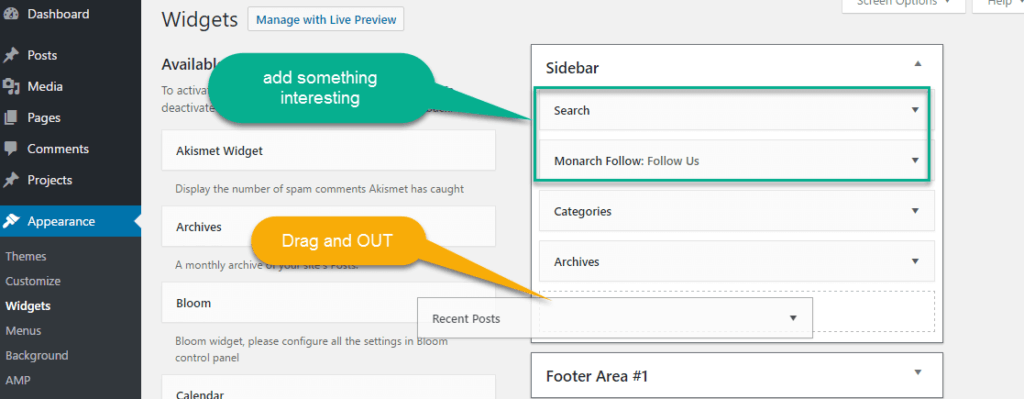
To add, just pick anything and add drag it into the Sidebar.
So, these setting are the answer to the Question that, “what to do after installing WordPress”
What to do after installing WordPress is not just a Question in my view. It is a way to optimized your blog to make it SEO friendly means the way of communication with the search engine like google.
https://youtu.be/S98QE0W9Y9c
Quick Recap
If you just installed WordPress, make sure that these essential settings are properly configured before doing anything else.
I’d recommend you bookmark this post so you can refer back every time you make a WordPress installation. Once you are done setting up WordPress, it’s time to do,
If you have any suggestion or problem about “what to do after installing WordPress” please feel free to comment below.


