

3 Ways to Move Installed Programs to Another Drive [Updated]

Struggling with limited disk space on your Windows PC? Wondering how to move programs to another drive on Windows 11/10? If so, you’ve come to the right place. Over time, installed programs and downloaded files take up a lot of disk space. Therefore, relocating certain program files to your other storage devices will be beneficial for maintaining system performance and freeing up disk space.
In this article, we’ll provide you with three simple solutions for relocating installed programs to another drive without the need to reinstall. Without further ado, let’s get started!
Is It Possible to Move Installed Programs to Another Drive?
Some Microsoft Windows users believe that they can easily move installed programs to another drive by copying and pasting. However, this solution is not feasible. Typically, during installation, a program registers its location in the Windows registry, establishing a link for proper execution. Simply copying files from the original drive (e.g., C:) to a new one (e.g., D:) disrupts these connections, rendering the program inoperable.
The most straightforward method is to uninstall the programs from the original drive and reinstall them. Unfortunately, it can be a time-consuming task, especially if you have numerous applications that need to be moved. You may miss critical steps during this process, leading to incomplete installations or other issues.
How to Move Programs to Another Drive Without Reinstalling?
Although you can choose other drives during installation, most software or programs are by default installed on the system drive (commonly known as the C drive). Therefore, the following three methods will be illustrated using examples from both the C drive and the D drive.
Method 1: Use a convenient tool to move programs to a different drive.
How can we quickly and safely move programs to another drive windows 11? Any Windows user would prefer to utilize convenient tools to conduct this task rather than manually uninstalling and reinstalling apps to a different disk.
The ideal solution for your needs is AOMEI Partition Assistant Professional, a useful disk management program for Windows PCs. This robust and practical program may be used to fix a wide range of hard disk and partition issues. “App Mover” is one of such effective features. You may transfer your installed apps using this feature without worrying about strange actions. Let’s see the specifics of moving applications from one disk to another after installing and starting Partition Assistant.
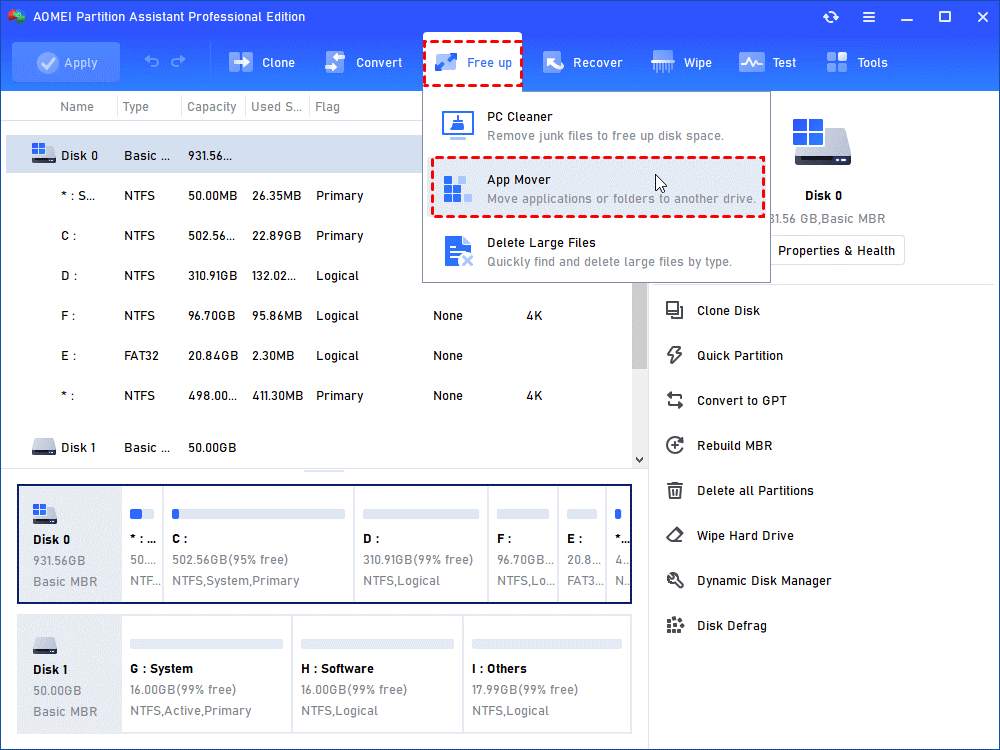
Step 1: Launch the “App Mover” feature.
After clicking “Free up,” choose the “App Mover” option.
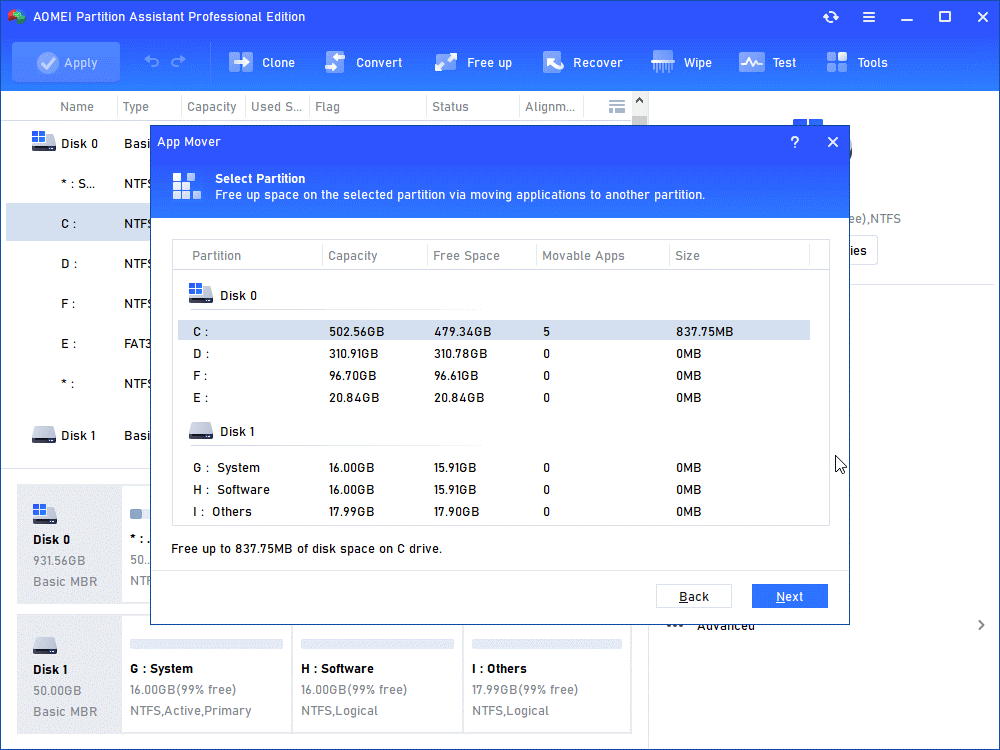
Step 2: Decide which partition you wish to use for moving apps.
All of the partitions will be shown in the new window, along with the quantity and size of installed applications on each one. Click “Next” after selecting a partition containing the target programs.
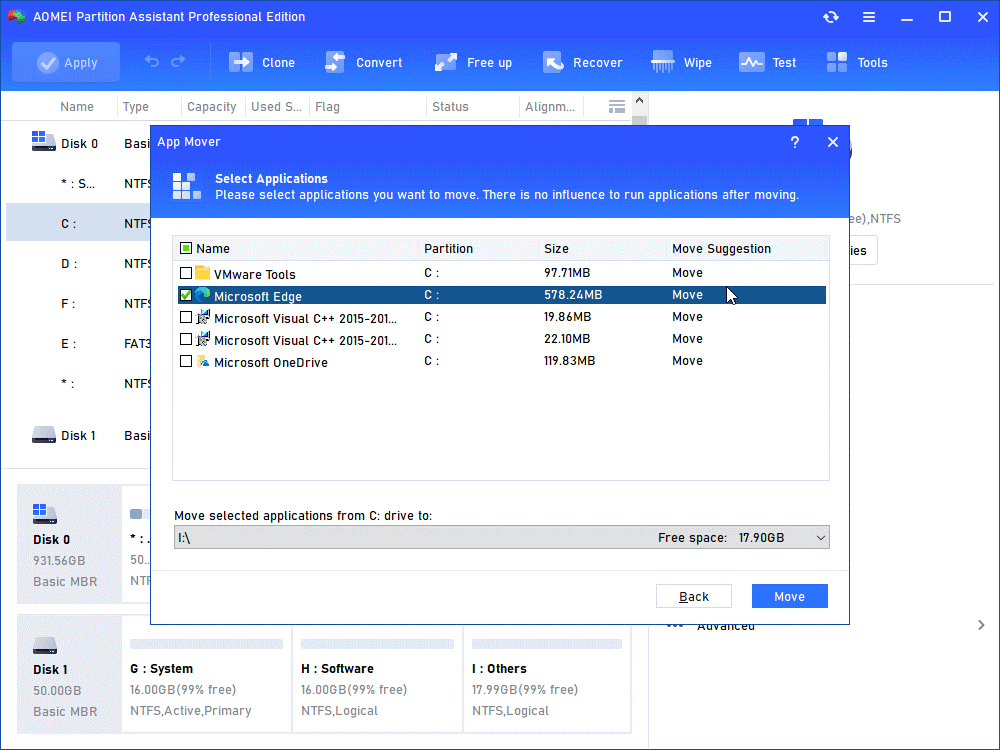
Step 3: Click “Move” after selecting the target location and the apps you wish to move.
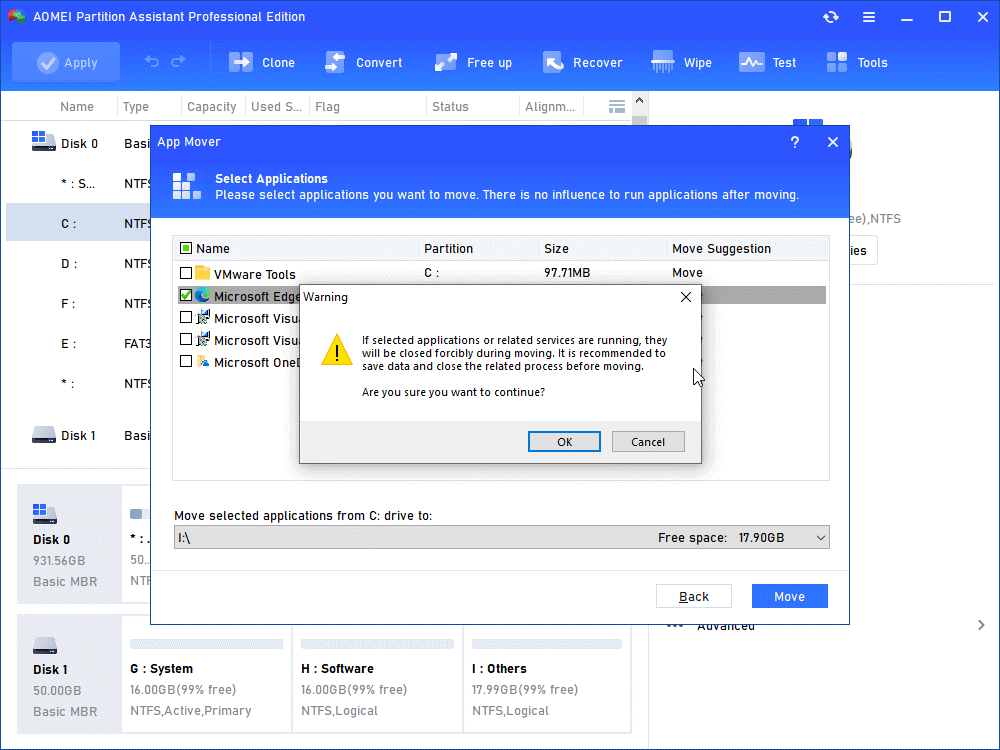
Step 4: When moving begins, you must confirm that running applications will be forcibly closed in the pop-up window. Press “OK” to start the procedure.
The operation of AOMEI Partition Assistant is simple for you to safely and quickly move your installed programs, and all programs you see in the list are movable, so you don’t need to worry about boot failure.
Method 2: Move Programs from C: to D: Drive via Windows Setting
If you are not comfortable with third-party tools, Windows Settings can be your ideal choice. While this method is not suitable for all installed programs, such as those that come pre-installed with the Windows operating system, the Microsoft support team highly recommends it. Given below is a step-by-step guide on how to move programs to another drive using Windows Settings:
Step 1: Press the Windows + I keys to open Setting. Then, click on “Apps.”

Step 2: Locate the application you want to move to another drive. Click on it and select the “Move” option.

Step 3: A prompt will appear, allowing you to choose the destination drive for the application.
Step 4: Reopen the program to see if it runs normally.
If only the ‘Modify’ option is available next to the selected program, or if the ‘Move’ and ‘Modify’ options next to the selected application appear in gray, turn to other methods mentioned in the article.
Method 3: Move Programs from C: to D: Drive by Modifying Program Registry (Caution)
On platforms such as Reddit and the Microsoft Support Community, some tech-savvy users mention that it’s often possible to move program files to another drive by manually tweaking the Windows Registry. Before adopting this solution, we recommend creating a backup or a system restore point in case something goes wrong.
The steps to move Programs from C: to D: Drive are as follows:
Step 1: First of all, create a new folder named ‘Program Files (86)’ in the C drive. Then, copy and paste the ‘Program Files’ and ‘Program Files (x86)’ directories into this folder.

Step 2: Open Command Prompt as an administrator by searching for “CMD,” right-clicking, and selecting “Run as administrator.”

Step 3: Run the following commands:
- Robocopy C:\Program Files X:\Program Files /mir
- Robocopy C:\Program Files (x86) X:\Program Files (x86) /mir
Step 4: Press the Win + R keys on your keyboard, type “regedit,” and hit Enter.

Step 5: Go to the following path:
- HKEY_LOCAL_MACHINE\SOFTWARE\Microsoft\Windows\CurrentVersion

Step 6: Locate the subkey corresponding to the program to be moved.
Step 7: Within the program’s subkey, look for the entry with the installation path (typically “InstallLocation”). Double-click on it and replace the old path with the new path on the target drive. Then, click on the “OK” button.
Step 8: Copy the program’s files from the old installation directory on the C: drive to the new directory on the destination drive (D drive in this case).
Why Should I Move Installed Programs to Another Drive?
Do you have to move installed programs to another drive? In most cases, the answer is yes. This is one of the most common methods to free up disk space, especially for your system drive. If the C: Drive is running out of space, it will negatively impact the overall performance of your computer. Relocating programs from the C drive to a different drive ensures that the operating system has sufficient available space to perform tasks, such as virtual memory, caching, and system updates
In addition, you can effectively manage and optimize disk space by using the built-in Disk Cleanup tool in Windows. This tool helps you identify and remove unnecessary system files, temporary files, and other items that can be safely deleted.
Wrap up
Now, you should no longer be puzzled about how to move programs to another drive on Windows 11/10. If you’re dealing with just one or two programs, a simple and secure method is to uninstall them and then reinstall them on the target drive. However, when dealing with a substantial number of programs, this approach may become time-consuming and cumbersome. A more efficient alternative involves leveraging Windows settings or professional disk management tools like 4DDiG Partition Manager.


