Introduction
Getting locked out of your iPhone may be irritating and worrisome, especially if you don’t remember the passcode or purchased a used device with limitations. Apple’s robust security safeguards, although intended to protect users, may become impediments when access is accidentally limited. Unlocking an iPhone isn’t always easy, whether it’s a forgotten screen passcode, a persistent iCloud Activation Lock, or Mobile Device Management (MDM) restrictions on business devices.
In this post, we’ll look at the many types of iPhone locks, how to bypass them, and why Dr.Fone – Screen Unlock is the most effective, all-in-one solution for regaining control of your smartphone fast and securely.
Understanding iPhone Lock Types
Apple gadgets are recognized for their superior security, and iPhones can have a variety of locks depending on the scenario and settings. Let us break them down:
A. Screen Passcode Lock
This is a lock that iPhone users use the most. Here, the users can choose a passcode of 4 or 6 digits or use biometric authentication like Face ID or Touch ID. When you enter a wrong password 10 times, the iPhone will be disabled and the user won’t be able to use it unless it has been restored access it needs through iTunes or a specialist equipment..
B. Apple ID and iCloud Activation Lock
This lock is tied to the user’s Apple ID and activates automatically when “Find My iPhone” is enabled. Even after a factory reset, the iPhone requires the original Apple ID credentials. This is a theft protection technique, but it may potentially trap people who buy used gadgets.
C. MDM (Mobile Device Management) Lock
This lock is commonly seen on company-issued or school-owned iPhones, and administrators enforce it. MDM limitations can limit app installation, enforce customizations, and even prohibit factory resets. MDM-enabled devices require administrator access to unlock.
Conventional Methods to Unlock iPhone
When dealing with a locked iPhone, various traditional methods can help you regain access. The following are four traditional techniques for iPhone unlock, each with step-by-step instructions.
1. Recovery Mode using iTunes or Finder
If your iPhone shows the warning “iPhone is disabled.” Connect to iTunes,” and then use recovery mode to restore it.
Requirements:
- A computer running iTunes (Windows or macOS Mojave and before) or Finder (macOS Catalina and later).
- Use a suitable USB cord.
- Your Apple ID and password (to overcome Activation Lock after a restore).
- A reliable internet connection (for downloading iOS firmware).
Follow the steps below to unlock your iPhone using iTunes or Finder:
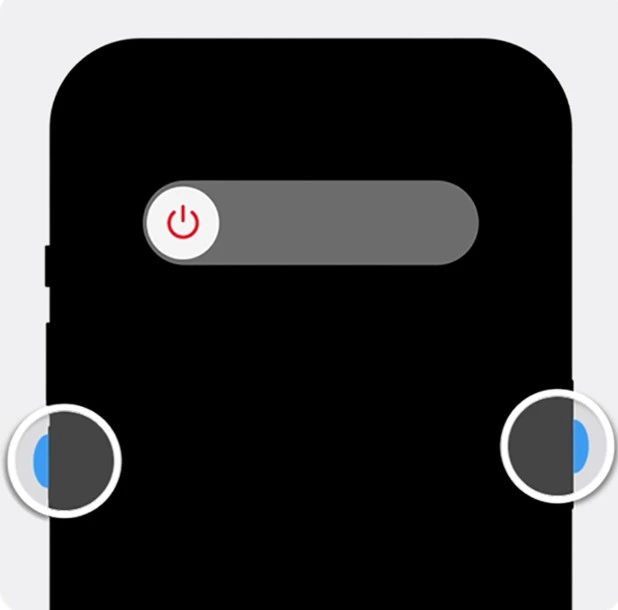
Step 1. Power of your iPhone device. Press and hold the side and volume buttons until the power of the slider appears. Drag the slider to turn off.
Step 2. Enter into recovery mode by pressing and releasing the volume button and connecting your computer until the recovery mode screen appears.

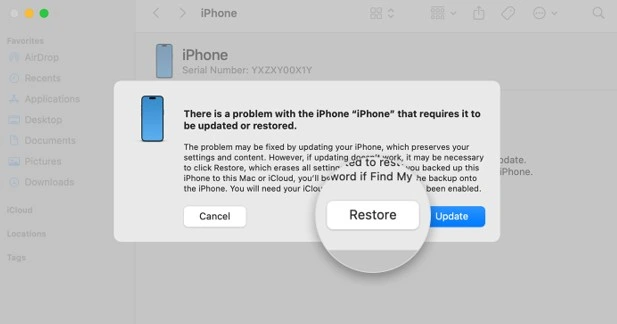
Step 3. Open iTunes or Finder on your computer.
Step 4. Find your device and select “Restore” from the options.
Step 5. When the process is completed, then set up your iPhone.
2. iCloud Remote Erase (Find My iPhone)
If “Find My iPhone” is activated, you can delete your device remotely using iCloud. Let’s see the steps below:
Step 1. Visit iCloud.com/find and sign in using your Apple ID.
Step 2. Select the “All Devices” option and then choose the iPhone you wish to wipe.
Step 3. Choose “Erase this Device” and confirm your selection.
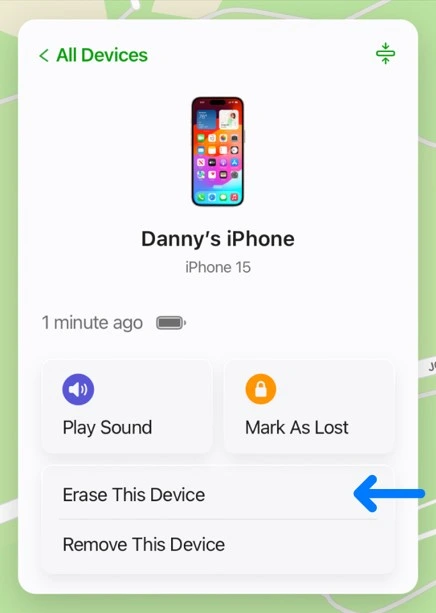
Step 4. To finish the procedure, follow the on-screen directions.
3. Lock Screen Erase (iOS 15.2+)
For devices running iOS 15.2 or later, Apple included the ability to delete the device immediately from the lock screen after several unsuccessful passcode tries. Follow the instructions below.
Step 1. After multiple unsuccessful passcode tries, the “iPhone Unavailable” or “Security Lockout” screen will show.
Step 2. In the bottom corner, tap “Erase iPhone.”
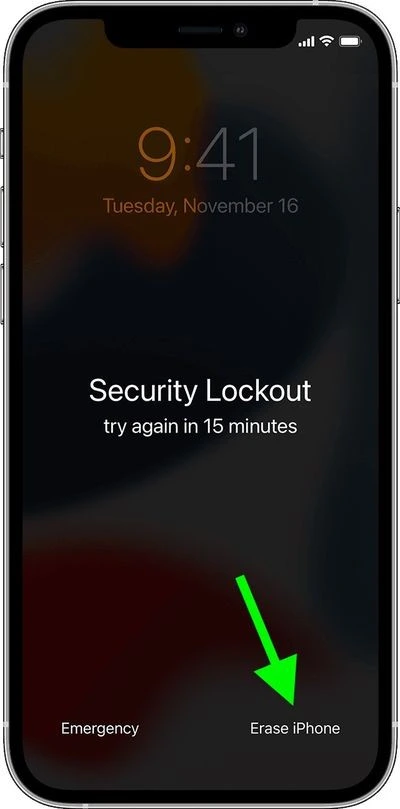
Step 3. Confirm by tapping “Erase iPhone” again.
Step 4. Signing out of your Apple ID requires entering your password.
The smartphone will delete all data and settings. Once completed, you may restore your iPhone as new.
4. Using Voice Control
Voice Control enables hands-free operation of your iPhone, which is handy in certain scenarios. Follow the steps below:
Step 1. Ensure that your iPhone is connected to Wi-Fi.
Step 2. Navigate to “Settings > Accessibility > Voice Control.”
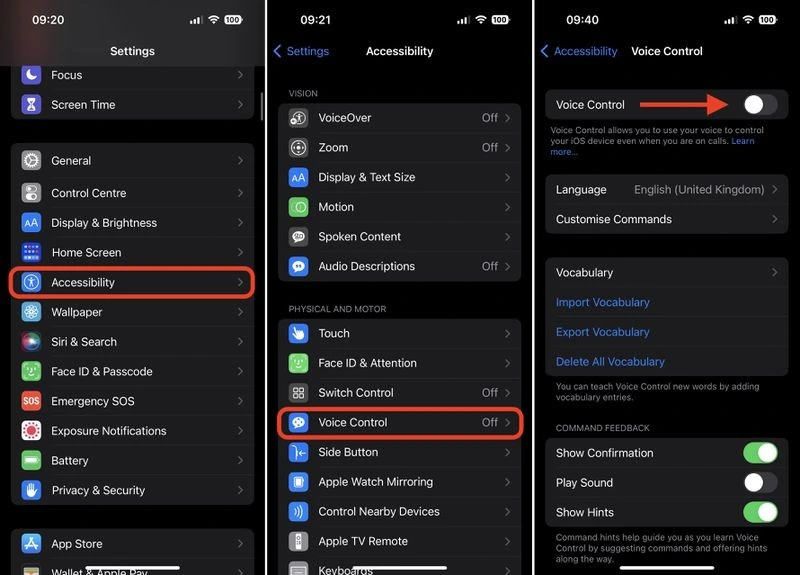
Step 3. Toggle to turn on Voice Control.
Step 4. Once configured, a microphone symbol will show in the status bar, indicating that Voice Control is enabled.
Dr.Fone – Screen Unlock: All-in-One Solution
Wondershare Dr.Fone – Screen Unlock (iOS) is a complete solution to overcome all possible available locks on iPhone. A user can bypass the various lock types, including screen passcodes, Apple ID/iCloud Activation Lock, Mobile Device Management (MDM) restrictions, SIM locks, and iTune backup encryption. Moreover, Dr.Fone is functional with the range of iOS beginning from the 7 to the 18 version. The process of Dr.Fone for iPhone unlock on your computer is accompanied by an interesting and easy-to-use interface that does not require any special IT skills.
Key Features
- Screen Passcode Removal: Unlocks disabled iPhones after several failed tries, including support for 4/6-digit codes, Face ID, Touch ID, and Screen Time passcodes.
- iCloud Activation Bypass: Removes Apple ID without passwords, even if “Find My iPhone” is active, giving you complete access to the device.
- MDM Profile Removal: Removes corporate limitations without affecting data, allowing personal usage of monitored devices.
- iTunes Backup Encryption Removal: Removes backup encryption settings without compromising data integrity, enabling regular backup and restore activities.
Step-by-Step Guide
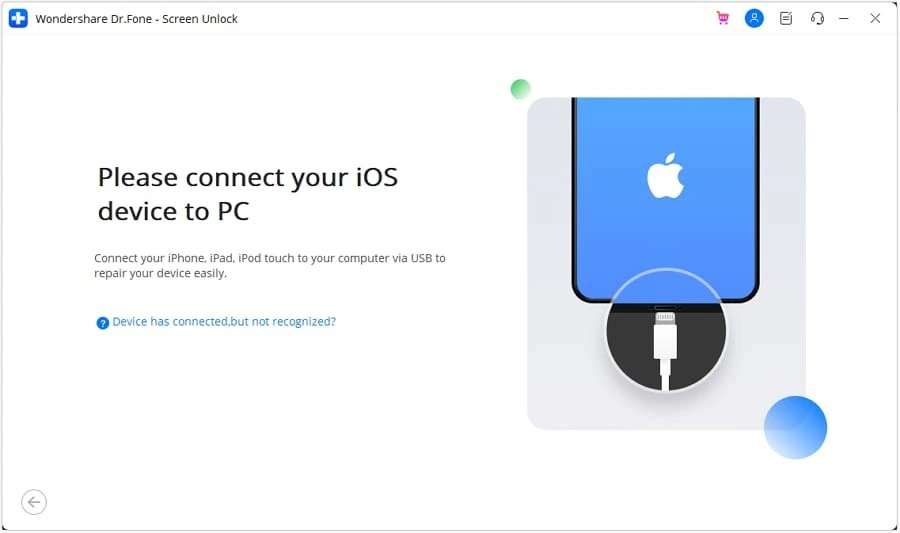
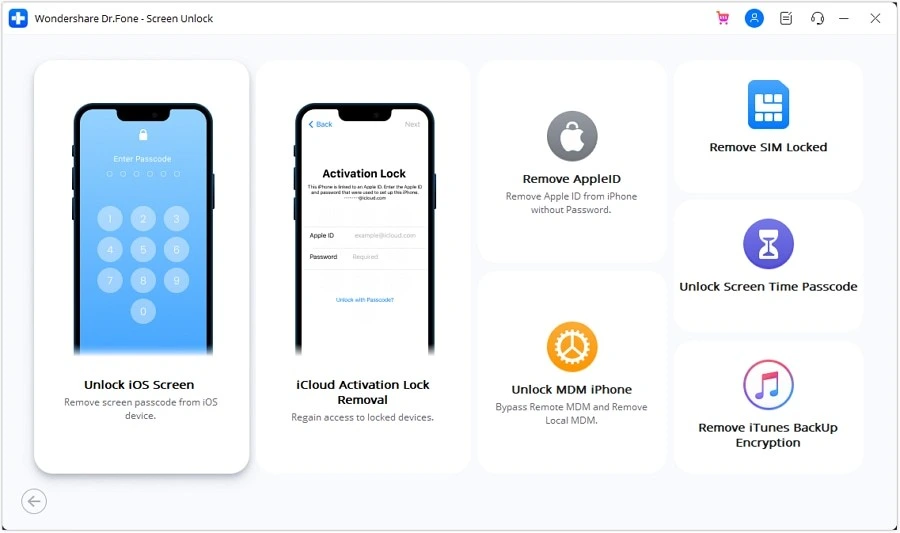
Step 1. Visit Wondershare Dr. Fone’s website, download the software, and then install it on your computer. Open the app and go to “Toolbox” > “Screen Unlock” > “iOS.”

Step 2. Use a USB cord to connect your iPhone to your computer.
Step 3. Select the right unlock option for your situation: “Unlock iOS Screen.”
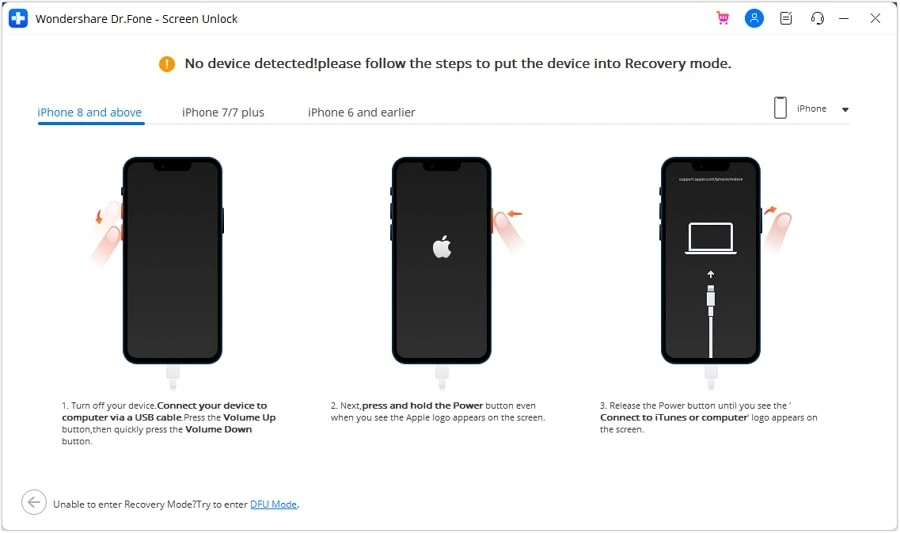
Step 4. Follow the on-screen directions to boot your iPhone into Recovery Mode. The instructions vary depending on the iPhone model.
Step 5. Dr.Fone will recognize your device model and download the correct iOS firmware.
Step 6. Click “Unlock Now” to start the unlocking procedure. Confirm your option, and the device will reset in 10-15 minutes.

Prevention & Best Practices
To maintain the integrity of your iPhone and prevent it from any unnecessary breaches, it is better to follow some prevention practices:
- Set a new password: It is advised to use a 6-digit passcode generated by a random number generator. Memorize the number and record it in a secure location. Change your passcode in the Touch ID & Passcode section of Settings.
- Biometrics: This approach requires an iPhone with a fingerprint scanner (from the iPhone 5s to the iPhone 8 Plus) or an iPhone X or later that supports face recognition. You’ll still want to establish a passcode as a backup in case your fingerprint can’t be read, or Face ID doesn’t identify your face.
- Backups: Regular iCloud and iTunes backups help mitigate data loss risks.
Conclusion
There are various viable techniques for unlocking an iPhone without using a passcode or Face ID. Whether you’ve forgotten your passcode, purchased a used smartphone, or are locked out after too many failed tries, there are dependable options available. This post walks you through six tried-and-true methods for regaining access.
It is advised to utilize Wondershare. Dr.Fone will erase the iPhone screen passcode or Apple ID password. Dr.Fone has been working for decades to provide better solutions to iOS customers, and you do not need to worry about the software’s security and privacy risks.